Showing posts with label nexus 7. Show all posts

Nexus 7 One Click Toolkit for Mac! - 2013 Model


Here are some Mac toolkits for all you Mac users. These toolkits will allow you to root, install TeamWin Recovery, unlock bootloader, and lock bootloader. All with a simple click of a button for your Nexus 7 2013 model!

How Do I Use These Toolkit?
1. Download the toolkit of your choice using the links below.
2. Unzip the file and click on click on the green Android icon. 
3. Enter your phone into bootloader mode: 
First power off your tablet and make sure it's unplugged then,press the volume up, volume down, and power button all at the same time. When your phone vibrates let go of the power button, but keep holding onto the volume up and down button. You will now see a green start screen. 
4. Follow directions on the screen. 

Change Log:
August 6 2013:
Initial Release
August 11 2013: 
Added One-Click Unroot/Stock toolkit
December 14 2013
Updated One-Click Root Toolkit to support Android KitKat
Added ClockworkMod Recovery One-Click Toolkit to support KitKat
Removed TWRP One-Click Toolkit - No support for KitKat yet

One-Click Root Toolkit
One-Click ClockworkMod Recovery Toolkit
One-Click Unroot/Stock Toolkit
One-Click Unlock Bootloader Toolkit
One-Click Lock Bootloader Toolkit

FAQ:
Q: When I launch the toolkit it says "No such file or directory".
A: Completely close Terminal, change the name the of folder, and then relaunch the toolkit.

Q: I tried changing the file name, but it still doesn't work, what should I do?
A: You can try using it on another computer or use the manual method located at the top of the article.

Credits - XDA
-----------------------------------------------------------------------------------------------------------------------------
Need Help or add/follow me?
-----------------------------------------------------------------------------------------------------------------------------
FOR EMERGENCIES: (Bricked phone, not turning on, ect) 
-----------------------------------------------------------------------------------------------------------------------------
Don't forget check out my YouTube channel and subscribe for more great videos!

How to Root New Nexus 7! - 2013 Model


This guide will show you how to root your new Nexus 7 (2013 model) by flashing a custom recovery and then installing Chainfire's SuperSU zip file. The entire process is fairly simple and will take about 15 minutes. 

If your still wondering why you should root your Nexus 7 here a couple of reason why you should: Backup and restore apps + app data, install custom ROMS, increase battery life, overclock, underclock, and so much more! 

Use the guide below to root your Nexus 7 2013 model. 

Warning! This will wipe everything off your phone! Backup your music, contacts, movies, etc. You have been warned!

1. Turn off your tablet, then press the volume down and power button at the same time. You will see a red text with "Restart bootloader". This is called fastboot mode.


2. Plug in your tablet to your computer via microUSB. Use the OEM USB cable to make it less likely to run into problems later into the process.

3. Download Nexus7RootNew.zip and UPDATE-SuperSU-v1.51.zip using the links below.
Download Nexus7RootNew.zip
Download UPDATE-SuperSU-v1.51.zip
 
4. Unzip Nexus7RootNew.zip and transfer the unzipped folder to your Desktop! This folder includes USB drivers, fastboot, adb, and TWRP.

5. Open "Device Manager" and make sure you see "... Android Phone" > "Android ADB Interface". If you don't, then use the "usb_driver" folder to properly install the drivers for your Nexus 7. Extra Help

6. The tablet should still be in fastboot mode and plugged in. Open "Command Prompt" on your computer and type this (press enter after each line):

cd Desktop
cd Nexus7RootNew
fastboot oem unlock

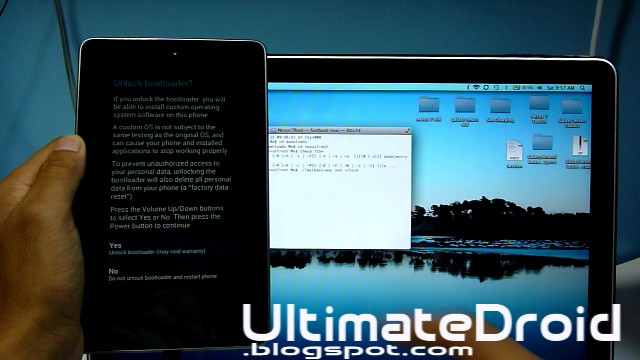
7. Your tablet will now show "Unlock bootloader?". Press the volume up and power button to unlock your bootloader. This will wipe everything on your tablet!!

8. Your tablet will now show "Start". Press the power button to boot up your tablet. 


9. Your boot up will take a little longer because everything was wiped. Once it finishes booting up you can correctly setup your tablet.


10. Transfer UPDATE-SuperSU-v1.51.zip to your tablet.


11. Enter your phone into fastboot mode again. Turn off your tablet, then press the volume down and power button at the same time. You will see a red text with "Restart bootloader".

12. Go back to your opened Command Prompt and type:

fastboot flash recovery openrecovery-twrp-2.6.0.0-flo.img

13. Press the volume up 2x until you see "Recovery" and press the power button. 

You will now be entered into TWRP. You have successfully flashed a custom recovery, but we still need to root our tablet. 


14. Select "Install" > locate and select "UPDATE-SuperSU-v1.51.zip". Swipe left to right to install the SuperSU zip file.


15. Once the process is complete reboot your tablet.

16. If you get stuck in a bootloop (doesn't get past the "X") Enter back into recovery and select "Wipe", then install the SuperSU again and reboot.

17. Once your tablet finishes booting up your rooted! To check if your rooted download an application like Titanium Backup from the Play Store and if you get SuperSU request you are rooted!

Enjoy flashing custom ROMS and using rooted apps! Welcome to the Android community!


Credits - TWRP & Chainfire
-----------------------------------------------------------------------------------------------------------------------------
Need Help With Your Android Device? Follow Me / Add Me / Like Me 
Twitter 
Facebook 
Google Plus
-----------------------------------------------------------------------------------------------------------------------------
Check Out Our YouTube Channel For More Great Guides! 
YouTube and Subscribe
-----------------------------------------------------------------------------------------------------------------------------
Don't Forget Our Weekly Android App Reviews!
Check Them Out, Here!

Nexus 7 One Click Toolkit for Mac!


Getting problems with these toolkits? Try the manual methods! RootClockworkMod Recovery, and Unroot/Restore to Stock!

Here are some Mac toolkits for all you Mac users. These toolkits will allow you to root, install ClockworkMod Recovery, unroot, unlock bootloader, and lock bootloader. All with a simple click of a button for your Nexus 7!

How Do I Use These Toolkit?
1. Download the toolkit of your choice using the links below.
2. Unzip the file and click on click on the green Android icon. 
3. Enter your phone into bootloader mode: 
First power off your tablet and make sure it's unplugged then,press the volume up, volume down, and power button all at the same time. When your phone vibrates let go of the power button, but keep holding onto the volume up and down button. You will now see a green start screen. 
4. Follow directions on the screen. 

Change Log:
August 16th 2012:
Initial Release
April 27th 2013:
Updated ALL toolkit with latest version of fastboot and ADB commands
Added Unroot/Stock 4.2.2 for Nexus 7 WiFi
Added Unroot/Stock 4.2.2 for Nexus 7 GSM + WiFi
July 28th 2013:
Fixed SuperSU transfer in the One-Click Root toolkit
Updated One-Click Root toolkit for Nexus 7 to support 4.3
Added One-click Unroot/Restore to 4.3 toolkit for Nexus 7 WiFi
Added One-click Unroot/Restore to 4.3 toolkit for Nexus 7 GSM

Updated One-Click Root Toolkit
One-Click Unroot/Restore to Stock 4.3 Toolkit WiFi
One-Click Unroot/Restore to Stock 4.3 Toolkit GSM+WiFi
One-Click Unroot/Restore to Stock 4.2.2 Toolkit WiFi
One-Click Unroot/Restore to Stock 4.2.2 Toolkit GSM+WiFi
One-Click ClockworkMod Recovery Toolkit
One-Click Unlock Bootloader Toolkit
One-Click Lock Bootloader Toolkit
One-Click Unroot/Restore to Stock 4.2.1 Toolkit WiFi
One-Click Unroot/Restore to Stock 4.2.1 Toolkit GSM+WiFi
FAQ:
Q: When I launch the toolkit it says "No such file or directory".
A: Completely close Terminal, change the name the of folder, and then relaunch the toolkit.

Q: I tried changing the file name, but it still doesn't work, what should I do?
A: You can try using it on another computer or use the manual method located at the top of the article.

Credits - XDA
-----------------------------------------------------------------------------------------------------------------------------
Need Help or add/follow me?
-----------------------------------------------------------------------------------------------------------------------------
FOR EMERGENCIES: (Bricked phone, not turning on, ect) 
-----------------------------------------------------------------------------------------------------------------------------
Don't forget check out my YouTube channel and subscribe for more great videos!
-----------------------------------------------------------------------------------------------------------------------------
Please check out the FAQ before asking questions!

Paranoid Android ROM Review for Nexus 7 & How to Install!


"To be honest, this is not tablet mode at all, it has nothing to do with silly build.prop hacks. This is the first and only Android rom to feature true Hybrid mode. This rom lets you scale and project every app, every widget, even systemcomponents individually. Remember, android is modular, everything is an app: Lockscreen, navigationbar, dialogs, popups, keyboards, widgets, and your regular apps of course. Apps have the capability to switch into various designs or layouts according to the device they run on. This can result in a complete new experience as many apps will transform to the better. 
Now for every element that you like chose a mode (PhoneUI, Phablet/Nexus-7UI, TabletUI) and/or a size. You are 100% independent of the system DPI which runs nicely in whatever value it has been assigned to. You do not need to boot your device into a certain DPI. Neither will most of the changes you apply require a reboot. You will not suffer from the myriads of troubles which normally haunt you under build.prop tablet mode. Your market, etc. will all work, apps won't shrink on you unless you shrink them yourself. This project will entirely transform your device, but retain the aesthetics and the feel of it."
Download Links Below: Download Parandroid Android Jelly Bean ROM
Download Gapps
Credits -
XDA


You MUST have ClockworkMod Recovery installed on your tablet!
Click Here for Mac!
Click Here for Windows!

1. Download Paranoid Android Jelly Bean ROM and Gapps from the links above

2. Connect you tablet to your computer via microUSB and transfer the files
Mac Users - Use Android File Transfer to transfer the zip files to your tablet.

3. Enter into ClockworkMod Recovery Mode
Press and hold the power button and volume down button until you see a green Android. Then, press the volume up 2x and power button to select "Recovery". 

4. Select "Wipe Data/Factory Reset", go back.

5. Select "Wipe Cache Partition", go back.

6. Selet "Advanced" > "Wipe Dalvik Cache"

7. Go back and select "Install zip from sd card" > "Choose zip from sd card" > Find the Paranoid Android Jelly Bean zip file you transfered earlier. 


8. Select "Choose zip from sd card" and install the gapps zip file.

9. Go back and select "Reboot system now". Wait at least 10 minutes for your tablet to boot up and enjoy your custom rom!

-----------------------------------------------------------------------------------------------------------------------------
Need Help or add/follow me?
Google Plus
-----------------------------------------------------------------------------------------------------------------------------
FOR EMERGENCIES: (Bricked phone, not turning on, ect) 
Email Me : techfanatic9@gmail.com
-----------------------------------------------------------------------------------------------------------------------------
Don't forget check out my YouTube channel and subscribe for more great videos!
-----------------------------------------------------------------------------------------------------------------------------
Please check out the FAQ before asking questions!

How to Root Nexus 7! [Windows]


This guide will show you how to root your Nexus 7 tablet on Windows with a video and written tutorial.


Here for Mac version!

Why would you want to root your tablet?
Rooting will allow you to get full access to your tablet. It gives you "admin" control for everything on your phone so nothing is unrestricted to the user. If you are coming from an Apple product it's like jailbreaking except 100x better!

Warning! Rooting your Nexus 7 will erase EVERYTHING on your Nexus 7 tablet so please backup everything before you start this process!

1. Plug in your phone via microUSB then enter your tablet into bootloader mode. Press the power and volume down button at the same time. Keep holding until you see a green Android robot.


2. Download Nexus7Root below and unzip the file. 

-->   Download Nexus7Root -->  -->    
3. Transfer the Nexus7Root folder into your downloads folder of your computer.


4. Next, we are going to install the correct drivers. Open device manager, locate a device named "Android" or a similar name and expand it. 
When is it expanded you will see Google Nexus 7 Bootloader Interface. 
Double click on the name and select "Driver"
Select: Update Driver
Select: Browse my computer for driver software
Select: Let me pick from a list of device drivers on my computer
Select: Have Disk
Select: Browse 
Now go to your "Downloads" > "Nexus7Root" > "usb_driver" >  "android_winsub"
Click "Ok" and close all the programs that are open. 

Noe: If you get a windows security message select "Install". 


5. Open command prompt and type:
fastboot downloads
fastboot nexus7root
fastboot oem unlock 

This will delete everything on your phone!!


6. On your tablet you will see "Unlock Bootloader?" select "Yes" using the power button. 


7. Press the power button to reboot your phone and you should see the setup screen. Setup your wifi, setup email, ect. 


8. Plug in your tablet via microUSB if you unplugged it and transfer UPDATE-SuperSU-v1.45.zip into your Nexus 7 internal storage. The zip file is located in the Nexus7Root folder. 


9. Enter your tablet back in bootloader mode. Press the power button and volume down at the same time until you see the green Android robot. 


10. In terminal type:
cd Downloads

cd Nexus7Root

fastboot flash recovery recovery-clockwork-touch-6.0.0.6-grouper.img
fastboot erase cache 


11. Press the volume up 2x and then power button to select "Recovery".


12. Select "install zip from sd card" > "choose zip from sd card" > Choose the file: “UPDATE-SuperSU-v1.45.zip” > Choose “Install UPDATE-SuperSU-v1.45.zip”.


13. Select "Go back" > "Reboot system now". 


14. You are now rooted! If you want to check to see if you rooted you download Titanium Backup from the Google Playstore and see if you get SuperSU permission. 

Need Help or add/follow me?
Google Plus
----------------------------------------------------------------------------------------------------------------------------------
FOR EMERGENCIES: (Bricked phone, not turning on, ect) 
Email Me : techfanatic9@gmail.com
----------------------------------------------------------------------------------------------------------------------------------
Don't forget check out my YouTube channel and subscribe for more great videos!
----------------------------------------------------------------------------------------------------------------------------------
Please check out the FAQ before asking questions!

How to Root Nexus 7! [Mac]


This guide will show you how to root your Nexus 7 tablet on Mac with a video and written tutorial.

Here for Windows version!

Why would you want to root your tablet?
Rooting will allow you to get full access to your tablet. It gives you "admin" control for everything on your phone so nothing is unrestricted to the user. If you are coming from an Apple product it's like jailbreaking except 100x better!

Warning! Rooting your Nexus 7 will erase EVERYTHING on your Nexus 7 tablet so please backup everything before you start this process!

1. Plug in your phone via microUSB to your tablet.


2. Enter your phone into bootloader mode. Press and hold the power button and volume down at the same time until you see a green Android robot.


3. Download Nexus7Root.zip below and unzip it. 

--> Download Nexus7Root.zip -->

4.  Transfer the extracted nexus7root folder into your downloads folder. Then, open terminal and type: 

cd downloads
cd nexus7root
chmod 755*
./fastboot-mac oem unlock 

This will delete everything on your phone!!


5. On your tablet you should see "Unlock Bootloader?" Press the power button to select "Yes". 


6. Press the power button to reboot your phone and you should see the setup screen. Connect to wifi, setup email, ect.


7. Plug in your tablet via microUSB if you unplugged it and download / install Android File Transfer and then transfer UPDATE-SuperSU-v1.45.zip into your Nexus 7 internal storage. The zip file is located in the Nexus7Root folder. 


8. Enter your tablet back in bootloader mode. Press the power button and volume down at the same time until you see the green Android robot. 


9. In terminal type:

cd Downloads
cd Nexus7Root


./fastboot-mac flash recovery recovery-clockwork-touch-6.0.0.6-grouper.img
./fastboot-mac erase cache 

10. Press the volume up 2x and then power button to select "Recovery"
11. Select "install zip from sd card" > "choose zip from sd card" > Choose the file “UPDATE-SuperSU-v1.45.zip” > Choose “Install UPDATE-SuperSU-v1.45.zip”.

12. Select  "Go back" > "Reboot system now". 


13. You are now rooted! If you want to check to see if you rooted you can download Titanium Backup from the Google Playstore and see if you get Super SU permission. 


Need Help or add/follow me?
Google Plus
----------------------------------------------------------------------------------------------------------------------------------
FOR EMERGENCIES: (Bricked phone, not turning on, ect) 
Email Me : techfanatic9@gmail.com
----------------------------------------------------------------------------------------------------------------------------------
Don't forget check out my YouTube channel and subscribe for more great videos!
----------------------------------------------------------------------------------------------------------------------------------
Please check out the FAQ before asking questions!

How to Unroot/Unbrick Nexus 7 on Mac!

-->

1. Plug in your tablet via microUSB.


2. Enter your tablet into bootloader mode. Press the power button and volume down button at the same time, keep holding until you see a green Android and start screen. 


3. Download Nexus7Unroot.Unbrick.zip below and extract the file.


--> Download Nexus7Unroot.Unbrick.zip
-->
4. Move the Nexus7Unroot.Unbrick.zip folder into your downloads folder.

5. Open Terminal and type: 


cd Downloads
cd Nexus7Unroot.Unbrick
./fastboot-mac flash bootloader bootloader-grouper-3.34.img
./fastboot-mac reboot-bootloader
./fastboot-mac -w update image-nakasi-jro03d.zip
./fastboot-mac oem lock


6. Reboot your phone by pressing the power button and you will be on complete Jelly Bean stock, like the day you first bought your Nexus 7.


7. Only continue if are having problems locking your bootloader!
In terminal type:
./fastboot-mac oem unlock


8. On your Nexus 7 you should see "Unlock Bootloader?" Select "Yes" using the power button.


9. In terminal type:
./fastboot-mac oem lock and you should now have a locked bootloader that is safe to give back to the manufacture.


Need Help or add/follow me?
Google Plus
----------------------------------------------------------------------------------------------------------------------------------
FOR EMERGENCIES: (Bricked phone, not turning on, ect) 
Email Me : techfanatic9@gmail.com
----------------------------------------------------------------------------------------------------------------------------------
Don't forget check out my YouTube channel and subscribe for more great videos!
----------------------------------------------------------------------------------------------------------------------------------
Please check out the FAQ before asking questions!